How to use the integrated ceiling nails?
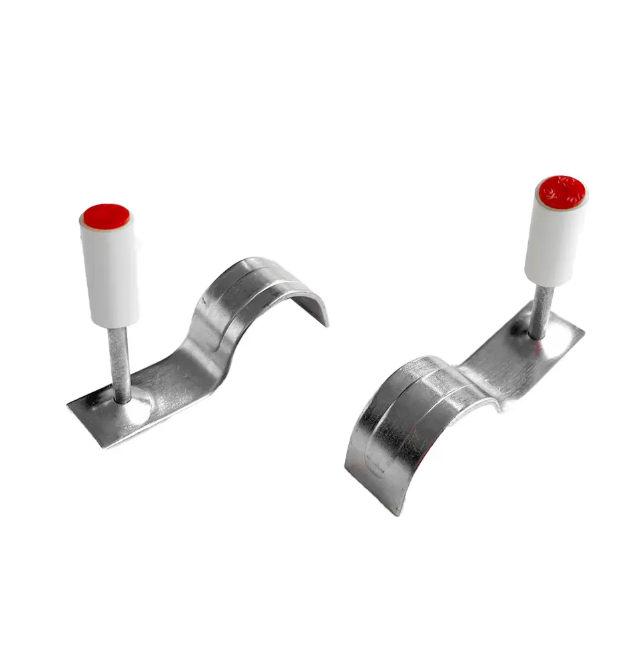
Integrated Ceiling Nails. shooting nails
Professional fasteners specially designed for integrated ceiling system installation. Engineered to securely attach ceiling panels (gypsum board, wood-based boards and modular ceiling components) to ceiling joists and structural substrates.
Featuring optimized shank length, specialized head design and enhanced holding power to ensure firm, stable fixation. Compliant with construction standards for reliable load-bearing performance.
Widely applied in residential, commercial and architectural ceiling projects. Delivers efficient installation, structural stability and long-term durability, ensuring flatness and aesthetic integrity of finished ceiling systems.
Step-by-Step Instructions for Using Integrated Ceiling Nails
Safety First: Wear safety goggles and work gloves during installation to prevent eye injuries and hand scratches. Ensure the installation area is clear of fragile items and electrical wiring.
1. Preparation Before Installation
-
Confirm the installation layout: Mark the installation positions of integrated ceiling nails on the building’s ceiling base (concrete/steel structure) with a pencil, keeping the spacing even (usually 30–40cm apart) according to the ceiling panel size.
-
Prepare tools and materials: Prepare matching ceiling fastening nailer (powder-actuated tool/air nailer), integrated ceiling nails, screw rods, ceiling keels and panels, and a level ruler.
-
Check accessories: Inspect that the ceiling nails are undamaged, the nailer is charged/ventilated properly, and all parts are intact.
2. Load the Ceiling Nails into the Fastening Nailer
-
Open the nail magazine of the ceiling fastening nailer according to the tool’s operation guide.
-
Insert the integrated ceiling nails straight into the magazine (align the nail shank with the guide groove, do not reverse or tilt the nails).
-
Close the magazine firmly and test the tool lightly to confirm the nails are loaded smoothly without jamming.
3. Drive the Ceiling Nails into the Base
-
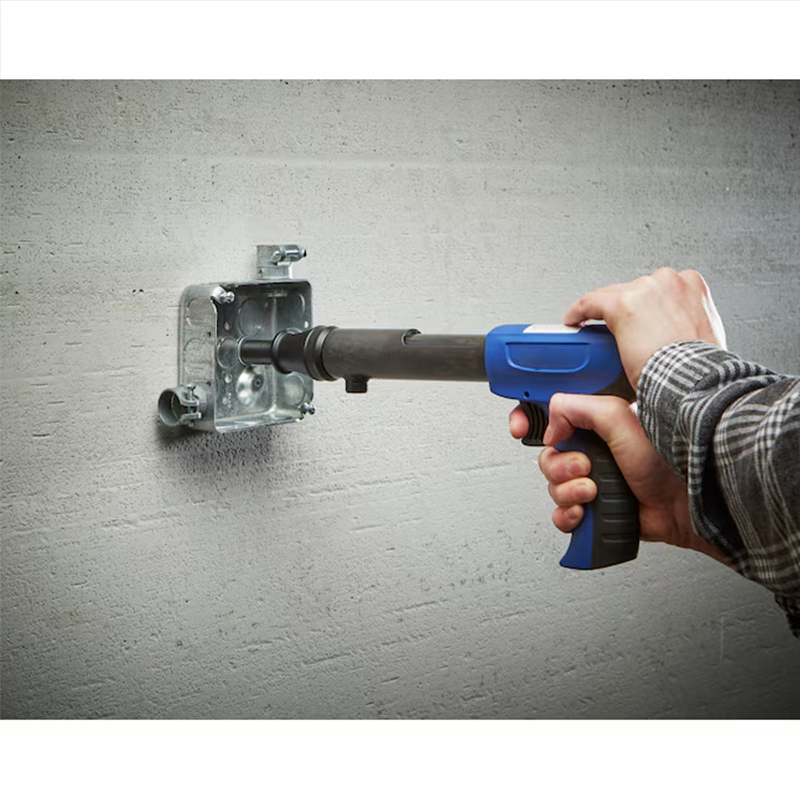
Position the nailer: Hold the nailer vertically and press its nozzle tightly against the marked installation point on the ceiling base (keep it 90° vertical to the base to avoid nail deflection).
-
Fire the nail: Press the trigger of the nailer steadily to drive the ceiling nail completely and firmly into the concrete/steel ceiling base (ensure the nail base is fully attached to the ceiling, no gaps or looseness).
-
Repeat the operation: Install all ceiling nails one by one at the marked positions, keeping each nail fixed stably.
4. Install Ceiling Components
-
Connect screw rods: Screw the matching screw rods into the fixed ceiling nails, tighten them moderately to ensure firm connection.
-
Mount keels and panels: Install the ceiling keels onto the screw rods, then fix the integrated ceiling panels to the keels.
-
Adjust flatness: Use a level ruler to check the ceiling surface, adjust the height of screw rods and positions of panels to make the whole ceiling smooth, level and seamless.
5. Final Inspection
-
Check all ceiling nails: Confirm each nail is firmly embedded in the base, no loosening, falling off or skewing.
-
Check the ceiling structure: Verify the screw rods, keels and panels are all stably connected, no shaking, gaps or unevenness.
-
Clean the site: Remove installation debris and confirm the ceiling is fully secured for safe use.